Apps & API keys
Terminology: the Developer Portal UI labels this object a “project”; these docs call it your app. It is the same thing — one OAuth client plus its Verification tab (API key + workflows). Where an API path literally says
project(e.g./verify/projects/{id}), keep the literal path.
Prerequisites
- A Valyd account. Sign up at https://dev.valyd.work if you do not have one. No KYC verification is required for portal access.
- The list of domains your application sends requests from (used for Allowed Web Origins).
- Your redirect/callback URL, without a trailing slash.
- A decision on which data scopes your application needs (
profile,verifications,zkp— detailed below).
Steps
This is a portal-driven setup. All steps below are performed by a human in the web UI at https://dev.valyd.work — there is no API to automate project creation.
Step 1 — Visit the Developer Portal and log in
Open the Developer Portal in a browser and log in with your Valyd account.
https://dev.valyd.workExpected output: You are signed in and see the Developer Portal dashboard with an option to create a new project.
Step 2 — Create the project and fill in project details
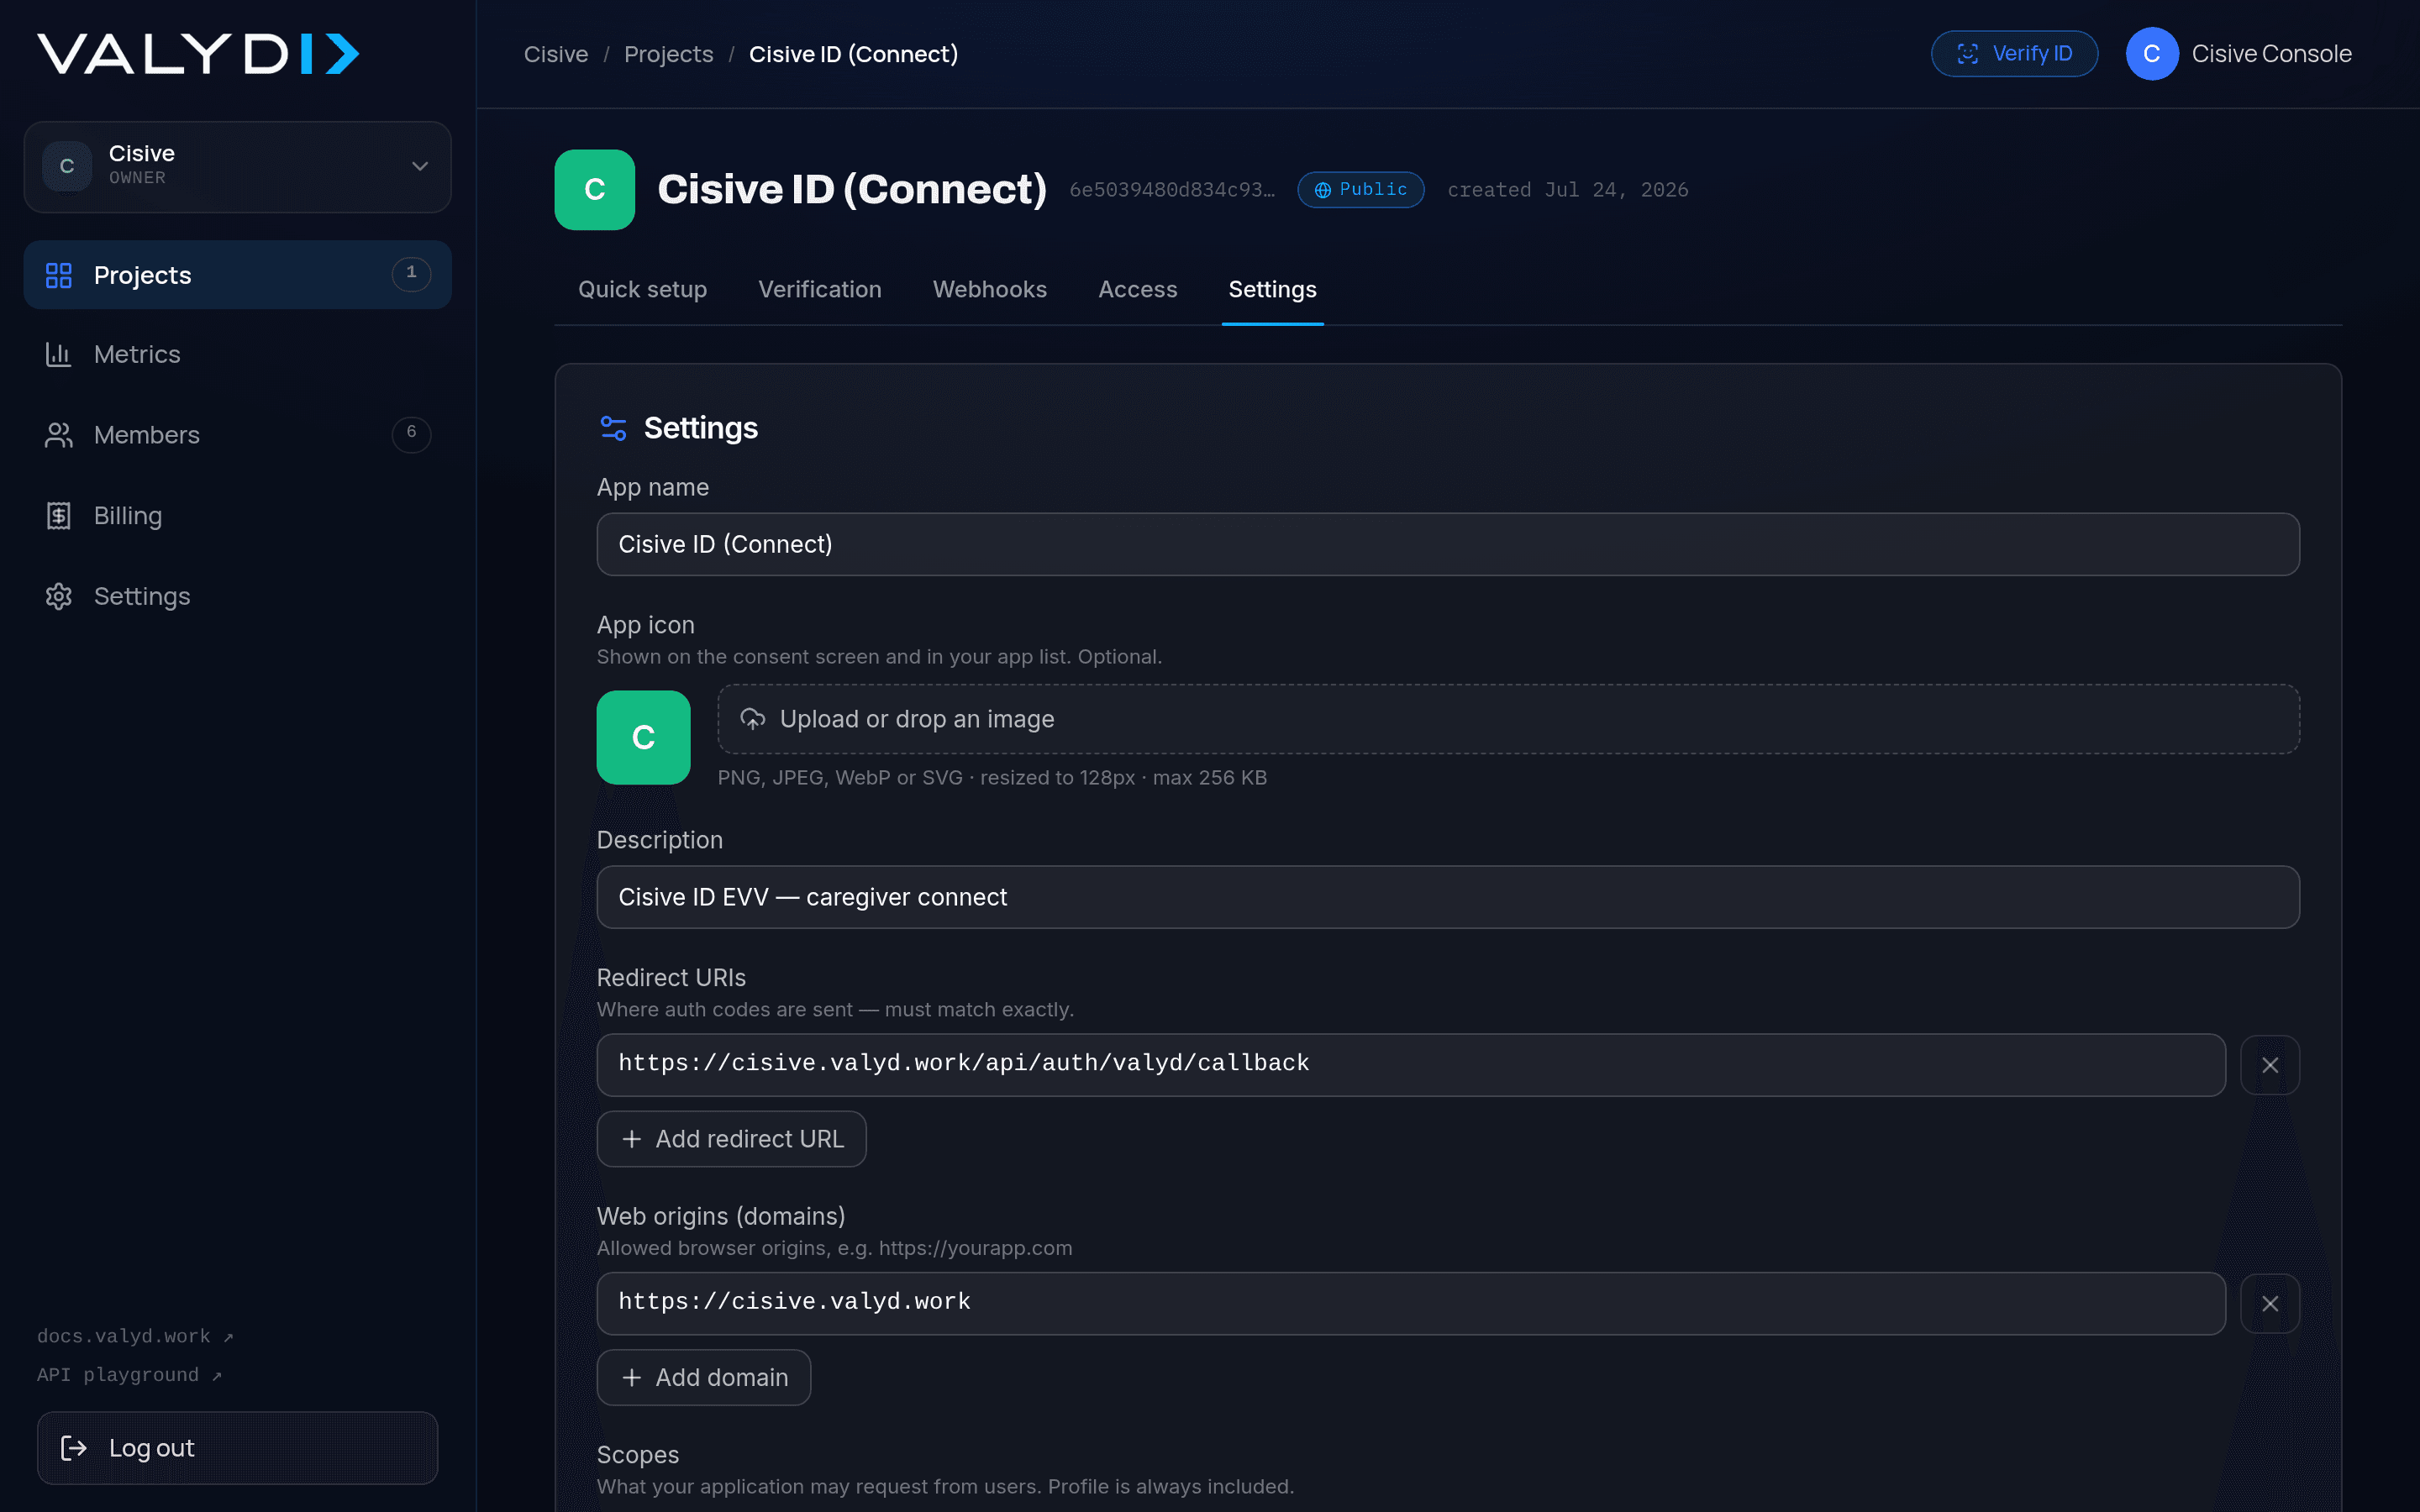
Click “Create Project” and fill in the following fields. Required/Optional status is as shown in the portal.
Project Name (Required)
- Your application’s name that users will see on the consent screen when logging in.
- Example:
My Awesome App
Description (Optional)
- A brief description of your application. Helps users understand what they’re authorizing.
Allowed Web Origins (Required)
- The domains from which your application will send requests. This is a security feature to prevent unauthorized domains from using your credentials.
- Example:
https://myapp.com, https://staging.myapp.com
Redirect URL (Required)
-
The URL where users will be redirected after authentication. This is where you’ll receive the authorization code.
-
Example:
https://myapp.com/callback -
IMPORTANT: The redirect URL must NOT end with a trailing slash (
/).IF your callback is https://myapp.com/callback → register exactly this (no trailing slash) IF your callback is https://myapp.com/callback/ → remove the trailing slash before registering
Allowed Scopes (Required)
Select the data permissions your application needs. Users will see these scopes on the consent screen. Available scopes and their fields:
profile— Required. Core biometric identity. Face vector is required for most Valyd features. KYC fields are optional.- Core Biometrics (always enabled — cannot be turned off):
Face Vector— Biometric face data, foundational to ValydFace Match— Facial recognition matching
- KYC Data (optional — select verification method):
Name— User’s self-reported nameAge— User’s age estimatePortrait— the photo extracted from the user’s submitted ID document during KYC (consent-gated; Valyd never exposes a stored face image — accounts hold only irreversible face vectors)
- Core Biometrics (always enabled — cannot be turned off):
verifications— Document-based identity verification.ID Verification— Government ID document verificationLicenses— Professional or driver’s licenses
zkp— Zero-Knowledge Proof verification: prove facts without revealing data.Age Verification— Prove age without revealing birthdateCountry Verification— Prove residency without revealing address
Expected output: The project form is submitted successfully.
Step 3 — Save only the credentials your path needs
After creating your project, you’ll immediately see a modal with your credentials.
Client ID — your unique application identifier. You can view this anytime in your project settings.
Example Client ID format: 9357c59bc1794b4c9efe8823e5878147Client Secret — shown only once.
Example Client Secret format: sk_live_a1b2c3d4e5f6g7h8i9j0...IMPORTANT: The Client Secret is shown only once. Copy and store it securely immediately. If you lose it, you’ll need to regenerate it.
For Verification API integrations, also copy the App API key shown by the portal. Store it as
VALYD_API_KEY on your backend and send it as X-API-Key. Do not send client_secret to
Verification API endpoints, and never expose either secret in frontend code.
Store only the credentials your chosen path needs, for example:
# .env (server-side only — never commit or expose in frontend code)
VALYD_CLIENT_ID=9357c59bc1794b4c9efe8823e5878147
VALYD_CLIENT_SECRET=sk_live_a1b2c3d4e5f6g7h8i9j0...

# Verification API only (does not require the two OIDC values above)
VALYD_API_KEY=vrf_...
Expected output: Connect with Valyd integrations have client_id + client_secret. Unique
Human API calls need only VALYD_API_KEY. Reusable Verification uses both, plus a workflow ID
and webhook secret.
Choose your next step
For Reusable Verification (Connect with Valyd, then verify what’s missing):
- Store your
client_secretsecurely in your backend environment variables. - Follow the Connect with Valyd quickstart; the SDK builds the OIDC URL.
- Handle the callback and exchange the one-time code for tokens using your
client_secret(backend only). - Use the
access_tokento fetch scoped account data, then run a verification with a configured workflow for anything missing.
For the Unique Human API (liveness and face uniqueness, API key only):
- Store
VALYD_API_KEYon your backend. - Do not build an OIDC login route — these calls involve no user account.
- Follow the Unique Human API guide.
Verification
There is no CLI/API check for project creation; verify manually in the portal:
IF you can see your project listed in the Developer Portal at https://dev.valyd.work  → project was created
IF the credentials modal showed a Client ID and Client Secret                       → credentials were issued
IF you saved the Client Secret before closing the modal                             → you can proceed
IF you closed the modal without copying the Client Secret                           → regenerate it from project settings (it is shown only once per generation)
Common errors
-
Redirect URL rejected / authorization fails with a redirect mismatch
- Cause: The registered Redirect URL has a trailing slash, or does not exactly match the
redirect_urlyour app sends. - Fix: Register the redirect URL with NO trailing slash and ensure the value used in the authorization request matches it character-for-character.
- Cause: The registered Redirect URL has a trailing slash, or does not exactly match the
-
Lost the Client Secret
- Cause: The Client Secret is shown only once when the project is created and was not copied before the modal was closed.
- Fix: Regenerate the Client Secret from your project settings in the Developer Portal, then update your backend environment variable.
-
Requests blocked from your domain
- Cause: The requesting domain is not listed in Allowed Web Origins.
- Fix: Add the exact origin (scheme + host, e.g.
https://myapp.com) to Allowed Web Origins in the project settings.